> For the complete documentation index, see [llms.txt](https://docs.powerfulform.com/llms.txt). Markdown versions of documentation pages are available by appending `.md` to page URLs; this page is available as [Markdown](https://docs.powerfulform.com/~/revisions/KRfi0fHdeAFeAhiPrH7G/customer-fields/add-customer-note.md).
# Add Customer Note
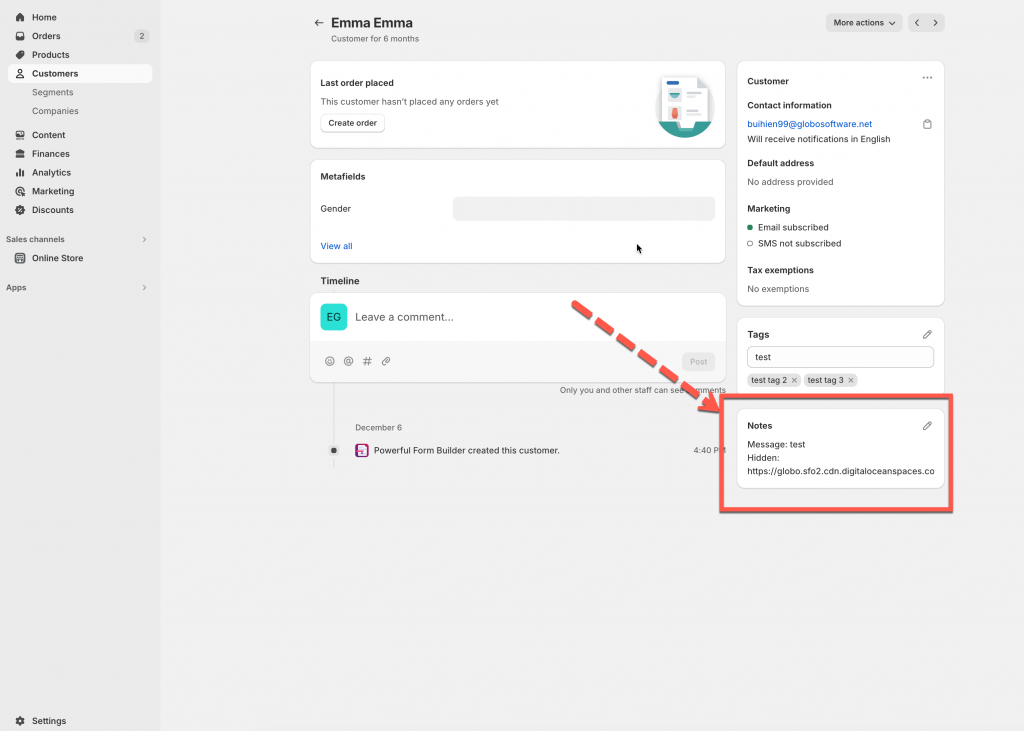
Use this feature to automatically add information submitted through your form into the **Note** field of the customer’s Shopify profile. This is useful for comments, extra details, notes from form submissions, and other custom data.
The ‘Customer note’ is visible here
Firstly, please make sure the form data is connect with Shopify customer data. [Learn more](https://globosoftware.net/kb/how-to-connect-form-elements-to-shopify-customer-data/)
### 🛠️ Steps to Set Up “Add Customer Note”
1\. Open the app > click **Forms** > open the form you want to edit
2\. Click the **Integration** icon on the left side > enable **Shopify** and click on the option name
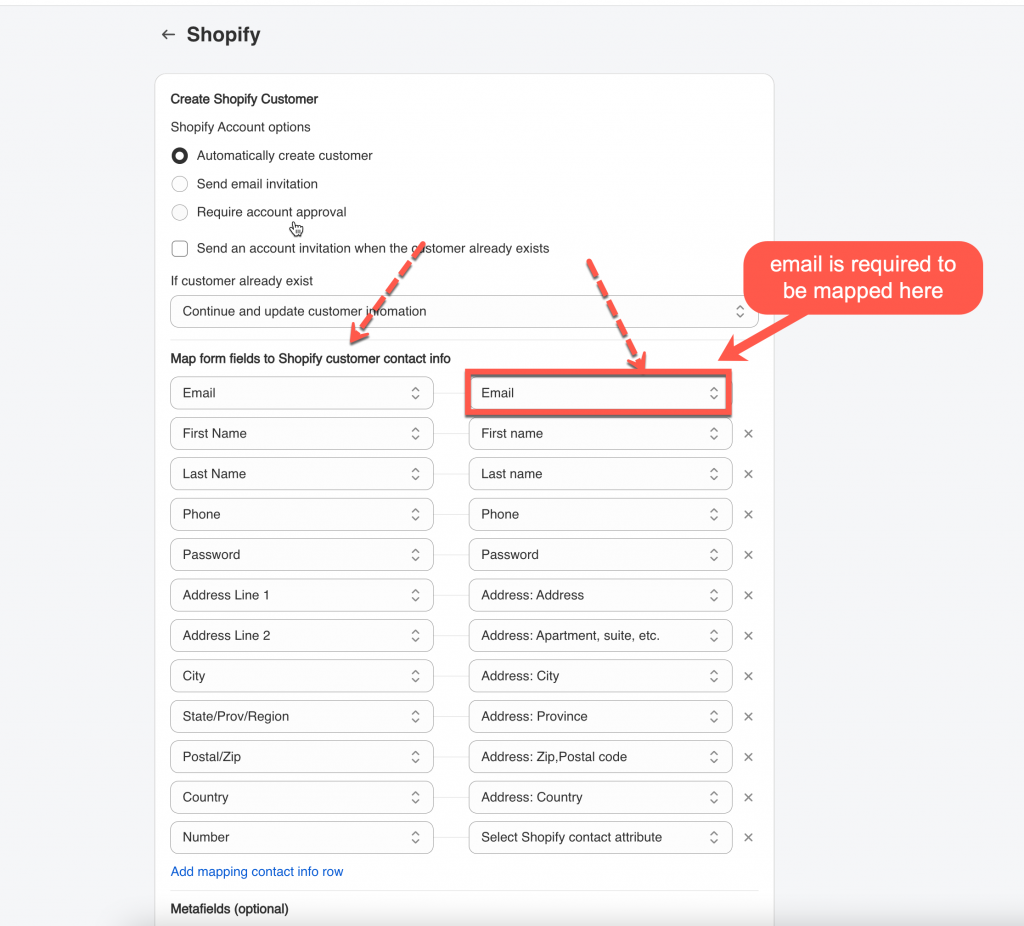
3\. Select **Shopify Account options**. They are **Automatically create customer, Send email invitation, Require account approval**
4\. Select the shopify attributes (on the right) to map with form fields (on the left). For example the Last name field of the form should be mapped with Shopify last name attribute,
⚠️ **Email** field on the form is required to be mapped with **email** attribute of Shopify.
5\. Add fixed value to the **Notes** field. Click **Form input** icon to show the variables of the form field and add to note field
Optionally, you can combine multiple form fields into one note (e.g. “Message: \[message\_field] — Preferred contact time: \[time\_field]”).
6\. Click **Save**
***
### ✅ How It Works
#### 🧍♂️ 1. Customer Submits the Form
A customer fills out your form on the storefront:
**Example form fields:**
* **Full Name:** Sarah Thompson
* **Email:**
* **Message:** “I would like to request a custom gift wrap.”
* **Preferred Contact Time:** Evening
They click **Submit**.
#### 🔄 2. App Adds the Data to Customer Note
Because you mapped these fields to the **Shopify Customer Note**, the app automatically writes the submitted data into the customer’s note section inside Shopify.
**Shopify Admin → Customers → Sarah Thompson → Note**
The Note field now contains:
```
Message: I would like to request a custom gift wrap.
```
#### 3. Result
* The information is stored directly in the customer’s profile
* You don’t need to click into submissions to see these details
* Support, sales, or fulfillment teams can easily reference the customer’s notes when needed