> For the complete documentation index, see [llms.txt](https://docs.powerfulform.com/llms.txt). Markdown versions of documentation pages are available by appending `.md` to page URLs; this page is available as [Markdown](https://docs.powerfulform.com/display-and-placement/pop-up-form-on-a-new-button.md).
# Pop-up form on a New Button
This guide explains two easy ways to display a popup form button on your Shopify store:
* **Method 1:** Assign the popup form button to a specific page (automatic placement)
* **Method 2:** Copy the popup code and insert the button anywhere on your page (custom placement)
Choose the method that fits your needs.
### 🛠️ **Method 1 — Assign the Button to a Page (Automatic)**
✨ *Fastest & easiest — the app inserts the popup button for you.*
**Step to add form**
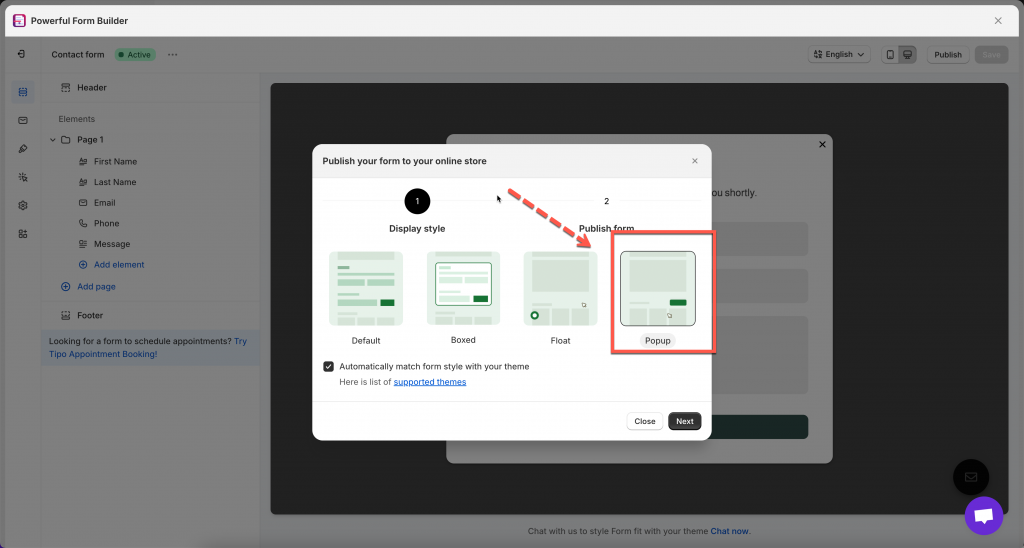
1\. Open the app > click **Forms** > open the form you want to display or create the new one
2\. Click **Publish** button at top right
3\. Select the display of the form – **popup**
📌 In the Publish window:
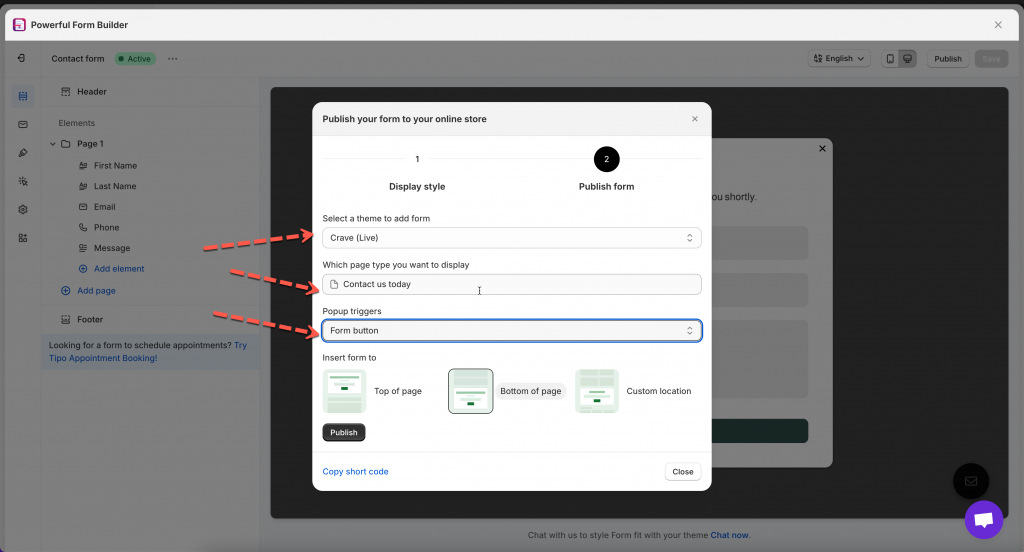
* Select your **theme**
* Select **Which page type you want to display**
* Under **Popup triggers**, choose **Form button**
4. Choose where to insert the button (Top / Bottom / Custom location)
5. Click **Publish** to apply.
Then click **View page** to see how it looks on the site
***
### 🛠️ **Method 2 — Add Popup Button with Code (Custom Placement)**
🎯 *Use this when you want the button to appear at an exact position on your page.*
#### 📝 Step 1: Copy the popup form code
1\. Open the app > click **Forms** > open the form you want to display or create the new one
2\. Click **Publish** button at top right > select the display of the form – **popup**
3\. On the popup, select the theme and the page you want to display the form on > Click **Go to theme** to enable the app embed to show form. If you enabled it, you can ignore the message
4\. In **Popup triggers** field, select **Form button**
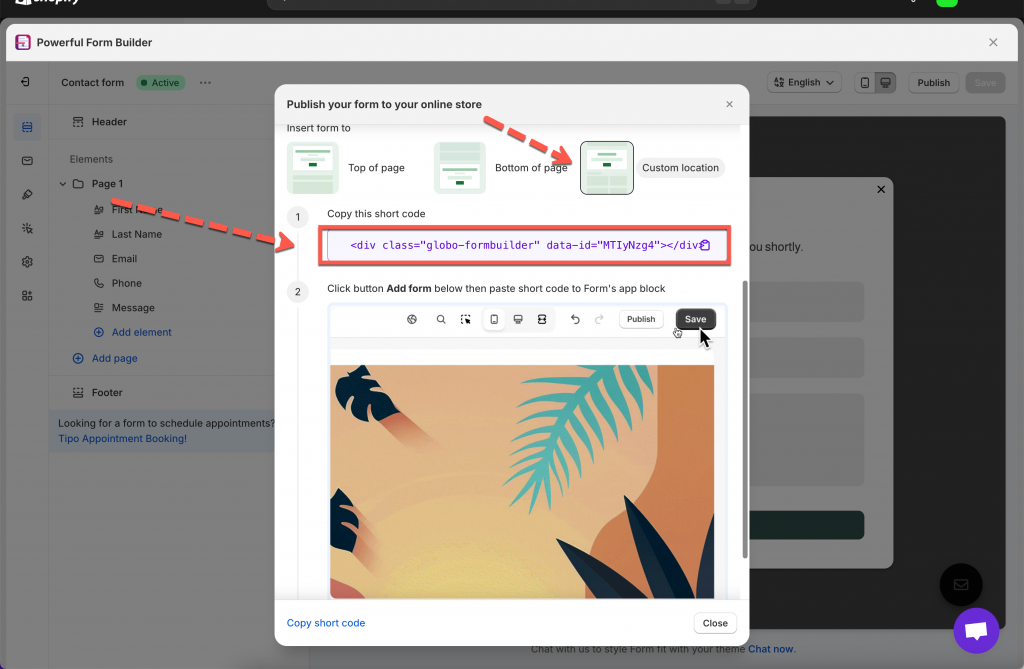
5\. Select the position **Custom location > copy the short code of the form**
Example code:
**``**
#### 📝 Step 2: Add button code to the position you want
For example : I want to add button to product pages. \
1\. From Shopify admin → **Online Store > Themes > Edit theme**
2. In the theme editor, open the **default** product template
3. Add an **app section** > select **Powerful Form Builder**
4. Paste the button code to the app section/block
5. Save.
***
### ✏️ Edit the Popup Button (Text & Style)
Once the popup button is added to your page, you can customize its **text** or **style** directly in the page editor.
#### ⚙️ Edit the Button Text
📝 *Change what the button says*
Example code:
```
```
Replace **Open form** with the button text you want. E.g. **Contact us**
Change to
```
```
#### ⚙️ Change the Button Style
🎨 *Adjust color, border, size, etc.*
The popup button automatically uses your theme’s default button style.
At the moment, the app does not include built-in styling options inside the editor.
If you want a custom style:
Our support team can style the button for you (colors, borders, font, spacing, hover effects, etc.).
📩 **Email:** \
Please include:
* The page link
* The form ID
* A description or example of the style you want\
(For example: “green background”, “rounded corners”, “larger button”, etc.)
We’ll be happy to customize it for you.
***
#### Need More Help?
If you still need assistance, please contact us at . Our team will be happy to help you resolve any issues or guide you further.