> For the complete documentation index, see [llms.txt](https://docs.powerfulform.com/llms.txt). Markdown versions of documentation pages are available by appending `.md` to page URLs; this page is available as [Markdown](https://docs.powerfulform.com/customer-fields/add-customer-tag/add-customer-tag-fixed-tag.md).
# Add Customer Tag - fixed tag
Using a **fixed Tag** lets you automatically attach a predetermined tag to a customer when they submit a form. This helps you label, organize, and segment customers consistently — for example: “newsletter-signup”, “wholesale-lead”, “giveaway-entry”, etc.
To achieve this, please make sure the form is connected to Shopify Customers first. [Learn more](/customer-fields/shopify-customers-integration.md)
### 🛠️ Steps to Add a Fixed Customer Tag
1\. Open the app > click **Forms** > open the form you want to edit
2\. Click the **Integration** icon on the left side > enable **Shopify** and click on **Shopify** option
3\. Select the shopify attributes (on the right) to map with form fields (on the left). For example the Last name field of the form should be mapped with Shopify last name attribute,
⚠️ **Email** field on the form is required to be mapped with **Email** attribute of Shopify.
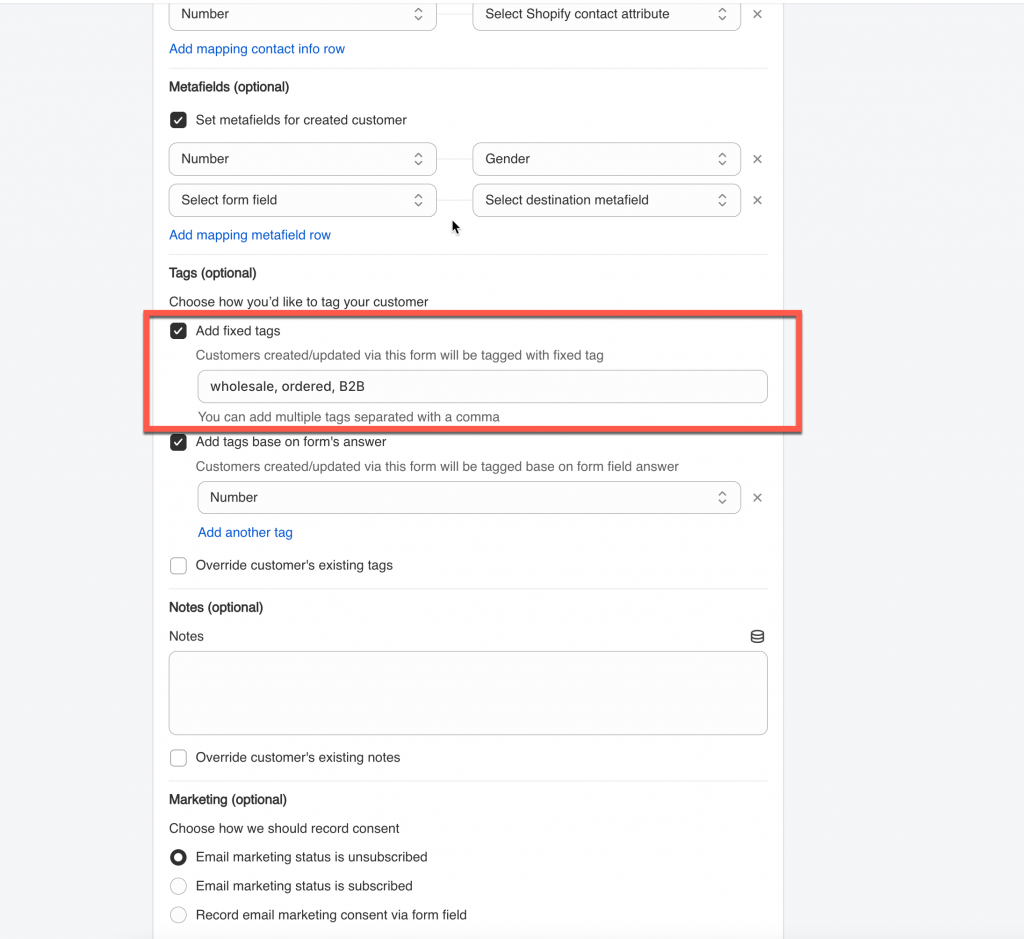
4\. Tick on the checkbox **Add fixed tags** > add the tag you want to the field. You can add multiple tags separated with a comma
For example: **`wholesale, ordered, B2B`**
5\. Click **Save**
***
### ✅ What Happens After Submission
Once you set a Fixed Tag in the Shopify integration settings, the tag will be automatically added to the customer profile every time the form is submitted.
#### 🧍♂️ 1. Customer Submits the Form
A customer fills out your form and clicks **Submit**.
#### 🔄 2. App Updates the Shopify Customer Profile
After the submission:
* If this is a new customer, the app creates a Shopify customer record
* If the customer already exists, their profile is updated
* Your Fixed Tag is added instantly to their customer account. In the **Tags** section, you will see the tag(s) you added in the integration settings.
***
#### Need More Help?
If you still need assistance, please contact us at . Our team will be happy to help you resolve any issues or guide you further
---
# Agent Instructions
This documentation is published with GitBook. GitBook is the documentation platform designed so that both humans and AI agents can read, navigate, and reason over technical content effectively. Learn more at gitbook.com.
## Querying This Documentation
If you need additional information that is not directly available in this page, you can query the documentation dynamically by asking a question.
Perform an HTTP GET request on the current page URL with the `ask` query parameter, and the optional `goal` query parameter:
```
GET https://docs.powerfulform.com/customer-fields/add-customer-tag/add-customer-tag-fixed-tag.md?ask=&goal=
```
`ask` is the immediate question: it should be specific, self-contained, and written in natural language.
`goal` is optional and describes the broader end goal you are ultimately trying to accomplish on behalf of the user. GitBook uses it to tailor the answer towards what is most useful for that goal.
The response will contain a direct answer to the question and relevant excerpts and sources from the documentation.
Use this mechanism when the answer is not explicitly present in the current page, you need clarification or additional context, or you want to retrieve related documentation sections.