# Zapier integration

Integrating your Powerful form with Zapier allows you to automate tasks, such as sending form submissions directly to Google Sheets or other apps, without any coding required.

**Note:** This integration is available on the **PRO plan** of Powerful Form Builder. A **paid Zapier plan** is also required.

<figure><img src="https://3488889492-files.gitbook.io/~/files/v0/b/gitbook-x-prod.appspot.com/o/spaces%2FEGgRVSDpMlcGFz1igK0s%2Fuploads%2F1uqwJTDsGHCLKDPvPIjS%2Fimage.png?alt=media&#x26;token=ce4b34c1-1f27-42e5-9b0b-4b7d58000dce" alt=""><figcaption></figcaption></figure>

What You'll Need:&#x20;

* A Google Sheet ready to receive form submissions.
* A Zapier account (with a paid plan).
* Access to your Powerful Form Builder dashboard.

***

### 📝 Step 1 : Create a new sheet in your Google Sheets

First, create a sheet you want to connect with the form in your Google Sheets

<figure><img src="https://3488889492-files.gitbook.io/~/files/v0/b/gitbook-x-prod.appspot.com/o/spaces%2FEGgRVSDpMlcGFz1igK0s%2Fuploads%2F62RLKdIXVo89iISBC1YW%2F2026-01-14_16-14-42.png?alt=media&#x26;token=d547d524-1792-4081-8a3c-8595bae1e124" alt=""><figcaption></figcaption></figure>

***

### 📝 Step 2: Catch hook in Weebhook by Zapier

Here you’ll create a Zap that **receives your form submission** through a Zapier webhook.

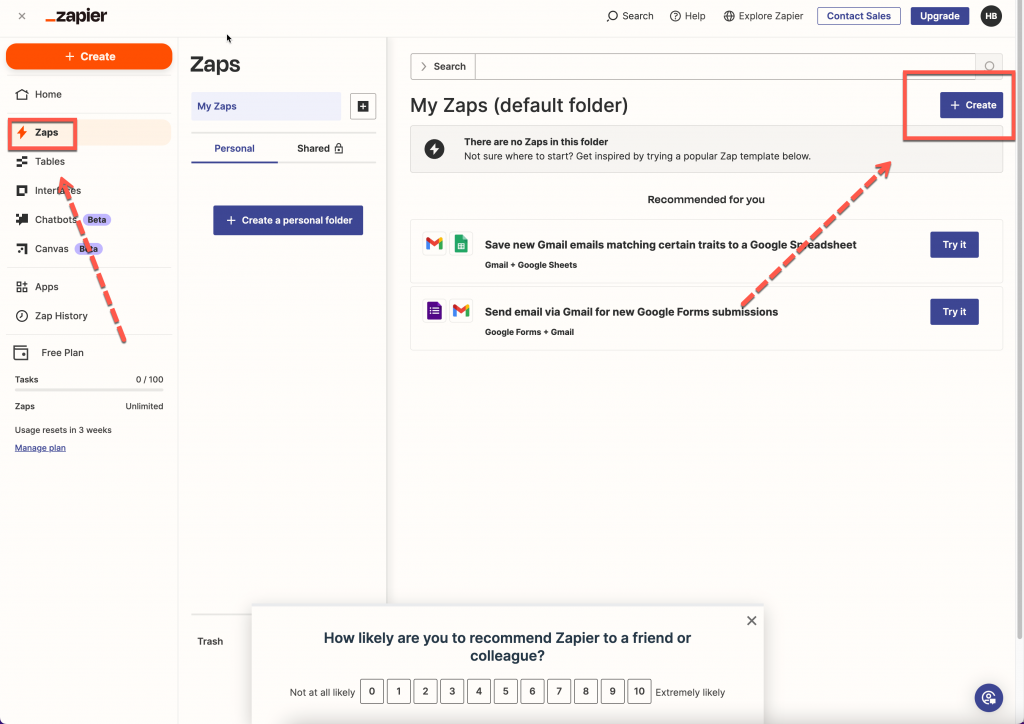
1\. In Zapier click **Create** button > select **Zaps**

<figure><img src="https://da76v9kevdkud.cloudfront.net/wp-content/uploads/2020/05/2024-07-15_14-53-26-1-1024x724.png" alt=""><figcaption></figcaption></figure>

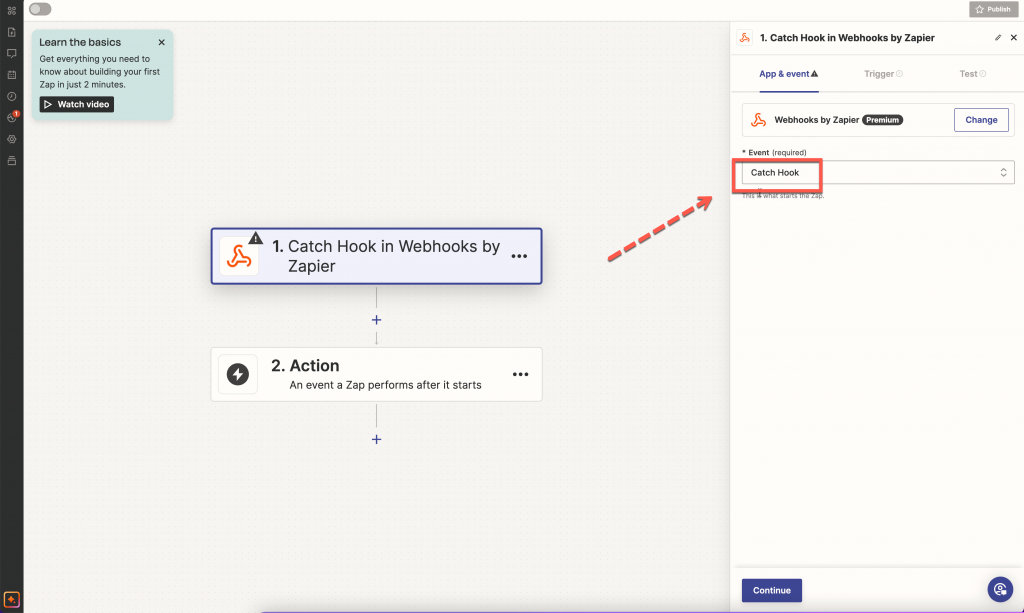
2\. Select **Trigger** > select **Webhook by Zapier** > select **Catch hook** > click **Continue** button >  you can skip **Pick off a Child Key**

<figure><img src="https://da76v9kevdkud.cloudfront.net/wp-content/uploads/2020/05/2024-07-17_15-05-27-1024x613.png" alt=""><figcaption></figcaption></figure>

3\. In **Test** tab, copy the your **webhook URL**

<figure><img src="https://da76v9kevdkud.cloudfront.net/wp-content/uploads/2020/05/2024-07-17_15-10-43-1024x703.png" alt=""><figcaption></figcaption></figure>

***

### 📝 Step 3: Add Webhook URL to Form builder app

Now you paste the Zapier Webhook URL into PowerfulForm so it knows where to send data.

1. Open the Powerful **Form Builder app** > click **Forms** > open a form > click **integration** icon >  enable **Zapier**&#x20;
2. Click **Zapier** option to open the setting

<figure><img src="https://3488889492-files.gitbook.io/~/files/v0/b/gitbook-x-prod.appspot.com/o/spaces%2FEGgRVSDpMlcGFz1igK0s%2Fuploads%2F4jT88z6GDqWqeiXLGWH6%2F2025-10-07_14-36-25.png?alt=media&#x26;token=549c6695-852e-4e5c-8c8b-167f697930af" alt=""><figcaption></figcaption></figure>

2\. Paste the **webhook URL** from Zapier here

<figure><img src="https://3488889492-files.gitbook.io/~/files/v0/b/gitbook-x-prod.appspot.com/o/spaces%2FEGgRVSDpMlcGFz1igK0s%2Fuploads%2FNFcAtPzPg2SctilsBCkM%2F2025-10-07_14-36-58.png?alt=media&#x26;token=a568aaba-96a8-418a-9e6b-bd204a98f7dd" alt=""><figcaption></figcaption></figure>

3\. Click **Save**

***

### 📝 Step 4: Create Spreadsheet Row in Google Sheets in Zapier

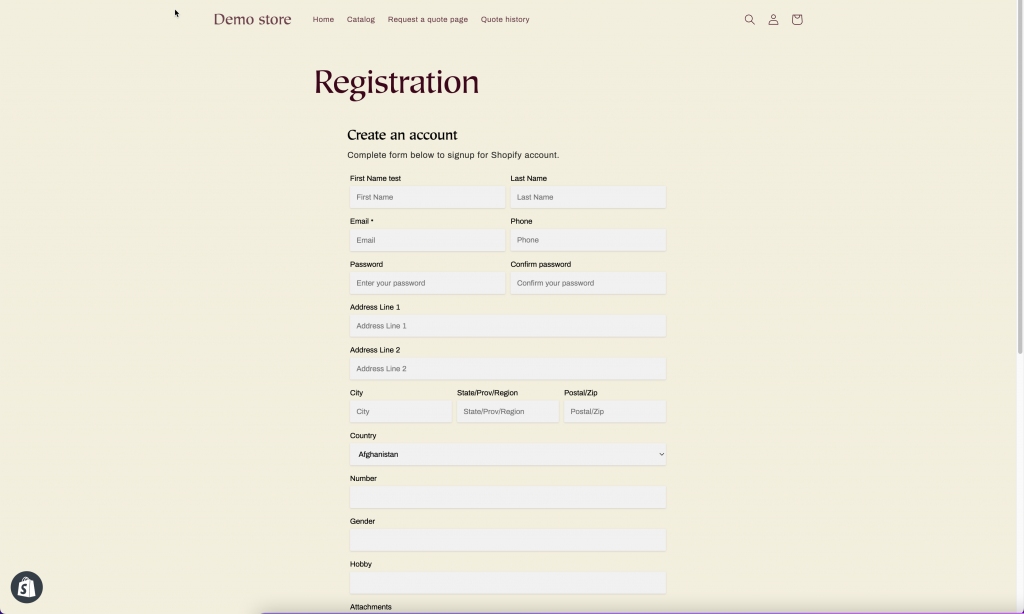
1. Submit the form once (from **app preview** or your **online store** if the form is published)

<figure><img src="https://da76v9kevdkud.cloudfront.net/wp-content/uploads/2020/05/2024-07-17_15-52-46-1024x614.png" alt=""><figcaption></figcaption></figure>

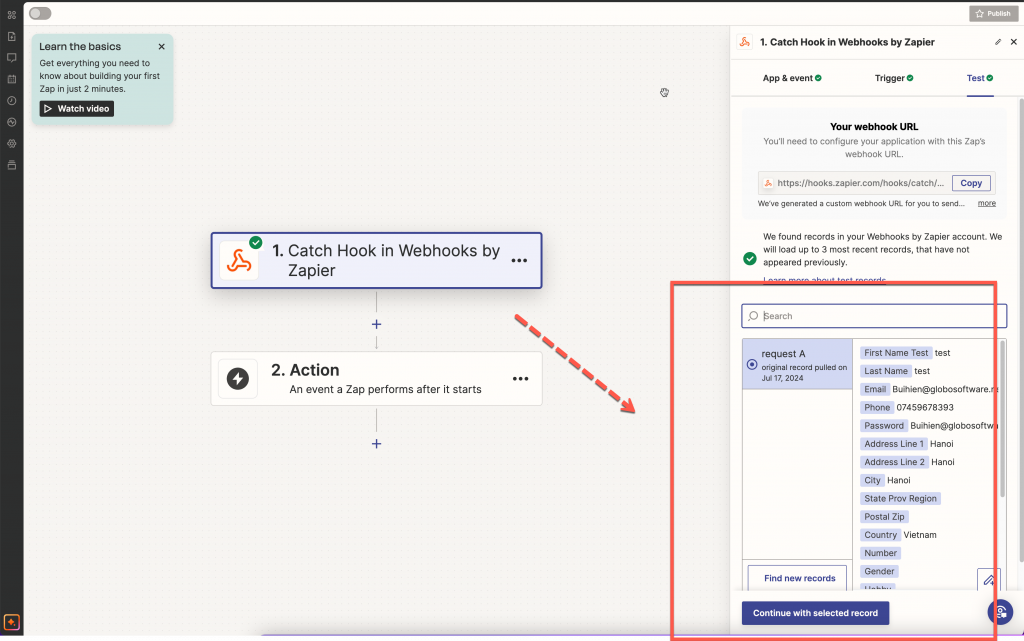
2\. Go back to **Zapier** > click **Test trigger** > the submission you have submitted is used to test > click **Continue with selected record**

<figure><img src="https://da76v9kevdkud.cloudfront.net/wp-content/uploads/2020/05/2024-07-17_16-20-52-1024x641.png" alt=""><figcaption></figcaption></figure>

3\. Search **Google Sheets** > select **Create Spreadsheet row > Continue** > sign into the Google account  > select the sheet you want to use  > map the form data with the sheet

<figure><img src="https://3488889492-files.gitbook.io/~/files/v0/b/gitbook-x-prod.appspot.com/o/spaces%2FEGgRVSDpMlcGFz1igK0s%2Fuploads%2FVZlxiNx7WH2ZGA7uE1JD%2F2025-10-07_14-38-11.png?alt=media&#x26;token=3888cf37-37f5-456e-9248-3b981345c61a" alt=""><figcaption></figcaption></figure>

<figure><img src="https://3488889492-files.gitbook.io/~/files/v0/b/gitbook-x-prod.appspot.com/o/spaces%2FEGgRVSDpMlcGFz1igK0s%2Fuploads%2FY10vGy4zn0pLfEaR9U33%2F2025-10-07_14-38-34.png?alt=media&#x26;token=09c5841a-996b-46fa-aabc-1bce7ed773db" alt=""><figcaption></figcaption></figure>

4\. Click **Test step** to submit a test > then check the result in the selected sheet in your Google Sheets

<figure><img src="https://3488889492-files.gitbook.io/~/files/v0/b/gitbook-x-prod.appspot.com/o/spaces%2FEGgRVSDpMlcGFz1igK0s%2Fuploads%2FaugWyr9BC089NMPFqLBq%2F2026-01-14_16-15-38.png?alt=media&#x26;token=9fa045b1-7ea5-4819-95d3-e1ece7eccc56" alt=""><figcaption></figcaption></figure>

✅ If the row appears, your integration works. Future submissions will also be added automatically.

***

### 🎥 Tutorial video

{% embed url="<https://www.youtube.com/watch?v=yP4mpN6ycUw>" %}

***

#### Need More Help?

If you still need assistance, please contact us at [**support@powerfulform.com**](mailto:support@powerfulform.com). Our team will be happy to help you resolve any issues or guide you further.
